This is a simple System Center Orchestrator 2012 installation step by step guide.
Before installing System Center Oechestrator 2012, review software, hardware and Operating System requirements.
Download the evaluation version of System Center Orchestrator 2012 from here
1. Run the SC2012_R2_SCO.exe. This will extract the installation files to the local drive

2. Choose destination location to extract the files;

3. Click on Extract to extract the files to the chosen destination;

4. Click finish on the extract completion wizard page;

5. Open the extracted source folder, then run SetupOrchestrator.exe as Administrator
 6. Click on Install;

7. On the getting started window enter the Name and organization. Both name and organization names are mandatory. The Next button will be greyed out if name and organization fields are empty.

8. If the production key is not entered, then System Center Orchestrator 2012 will be installed as evaluation version.

9. Agree the terms and Conditions;

10. Select the features wants to install;

11. Install will check the prerequisites

12. Enter the service account to use to run the runbooks and should able to access the remote resources;

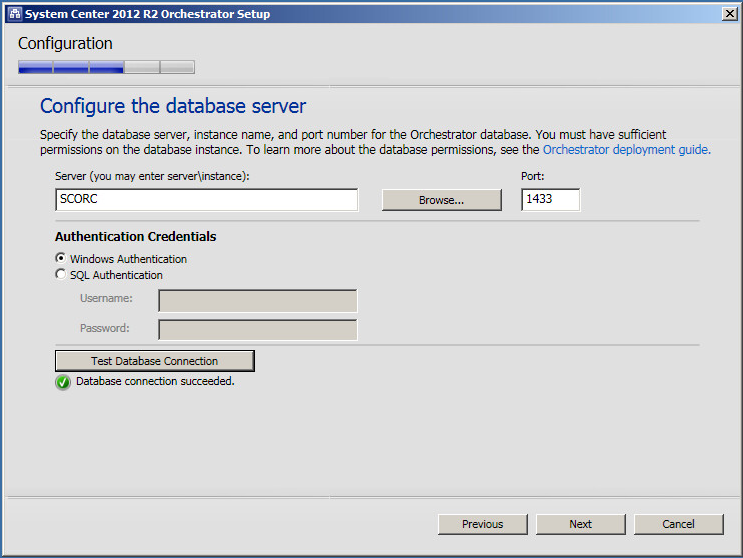
13. Configure the database server name and ports;
14. Configure the database to use;

15. Configure the Orchestrator user group preferably an AD security group;
 16. Configure the ports for Orchestrator Web Services

17. Select installation path;

18. Choose whether to install updates or no

19. Choose whether want to participate to help in improving Orchestrator or not;

20. Review the installation summary.
If anything need to be changed, click on change button;

21. Installation will start and will take some time to finish the wizard;

22. The finished window will be displayed once the installation is completed;

Before installing System Center Oechestrator 2012, review software, hardware and Operating System requirements.
Download the evaluation version of System Center Orchestrator 2012 from here
1. Run the SC2012_R2_SCO.exe. This will extract the installation files to the local drive
7. On the getting started window enter the Name and organization. Both name and organization names are mandatory. The Next button will be greyed out if name and organization fields are empty.
8. If the production key is not entered, then System Center Orchestrator 2012 will be installed as evaluation version.
9. Agree the terms and Conditions;
10. Select the features wants to install;
11. Install will check the prerequisites
12. Enter the service account to use to run the runbooks and should able to access the remote resources;
13. Configure the database server name and ports;
14. Configure the database to use;
15. Configure the Orchestrator user group preferably an AD security group;
17. Select installation path;
18. Choose whether to install updates or no
19. Choose whether want to participate to help in improving Orchestrator or not;
20. Review the installation summary.
If anything need to be changed, click on change button;
21. Installation will start and will take some time to finish the wizard;
22. The finished window will be displayed once the installation is completed;
No comments:
Post a Comment