The article is to provide steps involved in recovering a standalone System Center Configuration Manager Current Branch 1610 primary site.
This guide is for System Center Configuration Manager Current Branch 1610 only. Most of the steps will be same for the other versions, but please test it carefully on your test environment.
Before we start talking about SCCM site recovery using database backup, we need to prepare our current SCCM server and the new SCCM Server.
Prepare Current SCCM site server:
- Make sure that we have latest backup and it is valid (Preferably with in the retention period)
- Copy the whole backup folder to a different server or a network share
- Get Installed SQL server version and edition
- Copy the SCCM source content to some other server (if stored locally)
- Shutdown the server (Do not rename)
Prepare new SCCM Site server:
- Install OS and patch it fully
- Join to the domain using exactly same name as previous SCCM site server
- Install SCCM site server prerequisites (Roles and Features) - Refer to this article for complete list of prerequisites:
- Install ADK
- Install SQL server same version and edition as the production SCCM site server Database Server
- Copy the whole backup folder on to the local server
Site Recovery:
Launch splash.hta from <Backuplocation>\CD.Latest folder;

On the Microsoft System Center Configuration Manager window, click Install;

Click Next on Before you begin page;

On Getting Started page, under Available Setup Options select Recover a site then click next;

On Site Server and Database Recovery Options page;
Select Recover this site server using an existing backup then browse to the backup location.
For site database recovery options select Recover the site database using the backup set at the following location and browse to the path to the backup folder;

On Site Recovery Information, by default Recover Primary site will be selected. Click next;

Enter the product key or choose evaluation then click next;

Agree to all the product licenses terms and conditions then click next;

On Prerequisites downloads page, if prerequisites already downloaded then browse to the location or provide a path to download the files then click next;
This will start downloading or validating the files

On Site and Installation Settings page;
Site code will be auto populated along with the site name.
If we want to change the default installation directory then browse to the location and choose the option to install the SCCM console or not, then click next;

On the Database Information page, enter the SQL Server name. the database name is not required as it auto populates from the backup DB. Leave the service broker port to 4022 then click next;

On the second database information page, choose the path to the SQL server data file. by default, the SQL server data file will be stored under C:\Program Files;

Click next on Diagnostic and usage data;

On the summary page, review all the settings carefully. If all looks good, then click next;

Now the install will start and it will take some time. In my LAB it took just over an hour to recover the full site.

If the recovery media is different version then the backup Database site version, the Evaluating setup environment step will fail with "The site being recovered using a different build number than the build version of the ConfigMgr backup" error.
If everything is good the setup will continue.
Once we see Core setup has completed on the install page, click next; 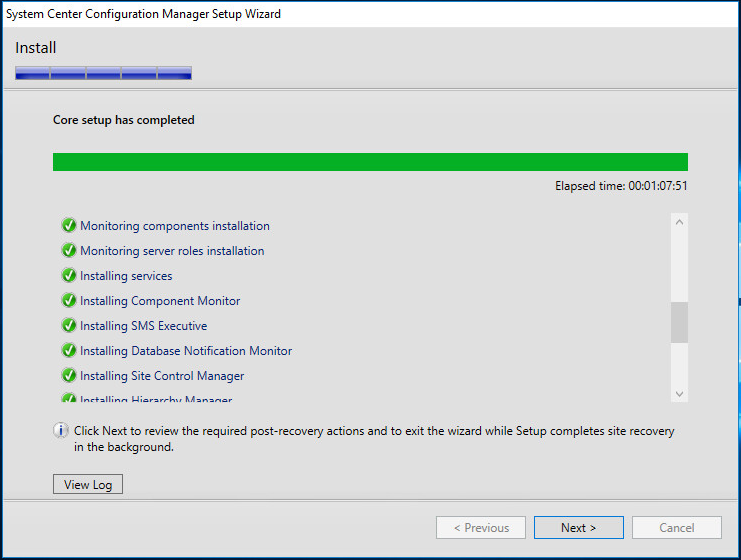
On the Finished page, we will see list of Post-recovery actions.

When we open the console, we can see all the objects. However, if the content source is store on the local SCCM server, then we need to create the same share and copy all the content to the new server. If the content is stored on different server, then applications will work without performing any additional steps.
That's it. we have successfully performed SCCM site recovery using existing database backup.
Click here for complete SCCM 1511 Current Branch step by step guide, step by step migration guide, step by step monitoring and health check guide and step by step SCCM Current Branch servicing guide.
No comments:
Post a Comment